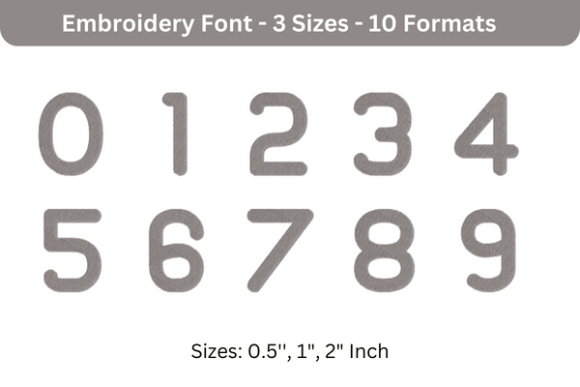
Ubuntu Font 0 to 9
Ubuntu Font 0 to 9 is a precision-crafted embroidery font set designed specifically for machine embroidery applications. Unlike standard digital fonts, this collection renders numbers 0 through 9 as stitch-optimized, balanced, and scalable vector-based embroidery designs — each digit engineered to maintain clarity, proportion, and structural integrity across fabric types and machine speeds. It’s not just typography; it’s functional design translated into thread paths.
This font set belongs in the preparation phase of any personalized embroidery project — whether you’re monogramming baby blankets, labeling uniforms, commemorating milestones on tote bags, or branding merchandise for a small business. Its role isn’t decorative abstraction; it’s operational. You select, scale, position, and merge Ubuntu Font 0 to 9 digits into larger compositions *before* sending files to your embroidery machine — making it a foundational asset in your pre-stitch workflow.
Where It Fits in Your Workflow
Ubuntu Font 0 to 9 integrates most effectively during the design assembly stage — after concept approval but before machine testing. For example, if you’re embroidering a wedding keepsake with the couple’s names and date, you’d use Ubuntu Font 0 to 9 for the year (e.g., “2025”) or day/month (“07/12”) because its consistent stroke weight, generous counter spaces, and moderate x-height prevent crowding or legibility loss at small sizes (as low as 0.3 inches tall).
It also supports iterative refinement. Because the set includes multiple file formats — DST, PES, EXP, JEF, VP3, and XXX — you can preview how each digit stitches in your editing software (like Wilcom E4, Embrilliance, or Brother PE-Design), adjust spacing without distorting stitch logic, and export directly to your machine model without conversion errors. That eliminates guesswork during the final quality check.
Compatibility and Real-World Use Cases
Ubuntu Font 0 to 9 works across major home and commercial embroidery platforms: Brother, Janome, Bernina, Baby Lock, Husqvarna Viking, and Tajima-compatible controllers. Compatibility isn’t assumed — it’s verified per format. If your workflow relies on automatic color sorting or thread change sequencing, these files retain embedded stop commands and jump stitch optimization, reducing manual edits in post-processing.
Hobbyists often use Ubuntu Font 0 to 9 to personalize children’s clothing with birth dates or school projects with numbered timelines. Educators embed them in tactile learning aids — think Braille-compatible number charts where stitch density and height support finger tracing. Small business owners apply them to product tags, inventory labels, and limited-edition packaging, ensuring brand consistency between printed and embroidered elements.
For freelancers managing client work, Ubuntu Font 0 to 9 streamlines version control. Since each digit is a discrete file, you can swap “6” for “9” in a date without re-digitizing an entire word. That saves time when clients request last-minute corrections — a practical advantage over monolithic text blocks.
Preparation Tips for Reliable Results
Start by verifying fabric and stabilizer pairing before stitching any Ubuntu Font 0 to 9 digit. Lightweight cotton requires medium tear-away stabilizer; knit fabrics need cut-away with light topping. Test stitch one digit — say, “8”, which has the most complex underlay — at your intended size and density. Observe how corners hold, whether inner loops pucker, and if satin edges remain smooth.
When combining digits with other design elements, align baselines precisely. Most embroidery editors let you snap to grid or use baseline guides — use them. Avoid stretching digits horizontally or vertically; instead, scale uniformly to preserve stitch ratios. If you need tighter spacing, adjust letter spacing (kerning) manually using your editor’s node tools — never free-transform.
Organize your files systematically. Name each digit clearly: Ubuntu_0_PES, Ubuntu_5_DST. Keep a master folder with subfolders for format, size variants (e.g., “Small”, “Medium”, “Large”), and usage notes. This pays off when revisiting projects months later or collaborating with production partners.
Integration With Broader Design Systems
Ubuntu Font 0 to 9 doesn’t exist in isolation. It complements — and should be coordinated with — your primary embroidery script or block font. If you’re using a flowing cursive for names, pair Ubuntu Font 0 to 9 with its clean geometry for contrast and hierarchy. That visual distinction helps viewers parse information faster: name first, then date or ID number.
For brands maintaining style guides, treat Ubuntu Font 0 to 9 like a typographic asset: document recommended minimum sizes, acceptable fabric pairings, and default stitch densities (e.g., 35–40 stitches per centimeter for medium-weight woven). Share those parameters with contractors or team members to ensure uniform output across batches.
It also interfaces with digital workflows beyond the embroidery machine. You can import PES or DST files into vector editors like Adobe Illustrator (via compatible plugins) to trace outlines for print layouts or laser-cut stencils. Or convert them to SVG for web-based mockup tools — useful when presenting embroidery concepts to clients before stitching begins.
Efficiency and Long-Term Usability
What makes Ubuntu Font 0 to 9 efficient isn’t just speed — it’s predictability. Once you know how “3” behaves on denim at 0.4 inches, you can replicate that result reliably across dozens of garments. That consistency reduces trial runs, minimizes thread waste, and shortens turnaround times — especially valuable during seasonal rushes or custom order surges.
Long-term usability hinges on format hygiene. Always keep original files unaltered. When modifying a digit for a specific job (e.g., adding a shadow stitch layer), save the edited version with a descriptive suffix — Ubuntu_7_shadow_PES — rather than overwriting the base file. This preserves integrity for future reuse and simplifies audits if a design issue arises downstream.
Also consider scalability planning. Ubuntu Font 0 to 9 performs well from 0.25" to 1.5" heights, but avoid pushing beyond those limits without testing. At very small sizes, underlay may dominate visual weight; at large sizes, satin column width may require manual adjustment to prevent gapping. Document your tested range per fabric type — it becomes part of your internal knowledge base.
Quality Control in Practice
Run three quick checks before final production: First, verify thread path continuity in your editor — no floating jumps or orphaned trims. Second, confirm that all digits in a sequence (e.g., “2024”) share identical density settings and underlay direction. Third, inspect the physical test stitch under natural light — look for skipped stitches in tight curves or inconsistent sheen on satin edges.
If you manage a team, build a 60-second checklist around Ubuntu Font 0 to 9 usage: Format matched to machine? Baseline aligned? Size within tested range? Stabilizer confirmed? Test stitched? Embedding those prompts into your SOPs prevents oversights that lead to rework.
Finally, track outcomes. Note which digits perform best on stretch fabrics versus wovens. Flag any recurring issues — e.g., “1” requiring extra underlay on fleece — and refine your prep process accordingly. That kind of observational discipline turns a simple font set into a lever for continuous improvement.